These are the greatest gift bags!!! Made with Stampin'UP! DSP AND fold flat for storage!! I made these for my team members for their Christmas Gifts this year and cannot wait to see them recieve them!!!


Here are the measurements for this bag -
Designer Series Paper - 2 pieces that are alike measuring 11" x 11-1/2"
For the decorations on the front you need a piece of coordinating card stock measuring 8" x 2-1/2"
Another piece of Designer Series Paper ( I used the back of the bag paper so the front coordinates and matches the inside of the bag) This piece needs to measure 8" x 2-1/4"
Then you will need a greeting and whatever else you want for embellishing the front of your bag.
You also need 2 pieces of coordinating cardstock measuring 11" x 1/2" for your bag handles.
Below are pictures of the scoring, however, it is easier to see all the details on this video!
FOR THE SCORING ON THIS BAG
FOR THE FRONT OF THE BAG:
With long side across the top score down at 3" and 11"

Then turn 1/4 turn and score down at 3" and score at 4-1/2" BUT ONLY TO THE FIRST SCORELINE!!

Then turn back to original position and score at 1-1/2" but only down to the first scoreline.

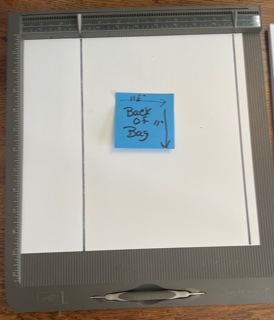
FOR THE BACK OF YOUR BAG:
With long side across the top score down at 3" and 11"
Turn 1/4 turn and score down at 3" and this time score down at 4-1/2" all the way to the bottom (this is the difference from the scoring on the front)

Turn back to original direction and score at the 1-1/2" but only down to the first scoremark.

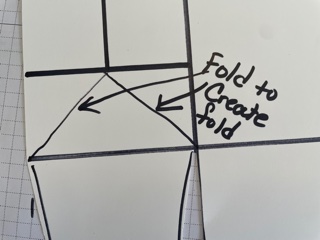
Now you need to burmish all your lines and cut away the bottom right section. Then angle the remainder of the side flap and on the bottom left square cut up to the score line and the angle this flap. This is done the same on the front and the back.


Before putting the bag together you need to decorate the front of your bag, Then you put glue on the right side flap of the back of your bag and attach the front to the back. Then by flipping it a bit you can do the same with the right side of the front and attach the other sides together too, Before putting handles on take a ruler and mark at the 2" and the 6" of both the front and back pieces to know where to place your handles.
For the bottom of the bag start with the back flap down first. The put glue on both end flaps and fold them down. Lastly put glue on the front flap and put it down. Flip your bag over and press from the inside on the bottom to make sure everything is in place.
The last thing you need to do is glue on the handle. Put glue on the bottom of your strip and attach to the inside of the bag at your marked spot. Now, fold it towards the back and twist it to fasten the other end to the other mark on the same side of the bag.
Your bag is complete!!!!
Enjoy!!

Here are a few more of the bags I made!


No comments:
Post a Comment