6/29/2020

Join My Team!!

We only have one more day to take advantage of the bundle bash when you join my team!!

Not only do you get to choose $125 worth of product for just $99, you also get to pick another stamp/tool bundle for free!!! Once you have taken that step then you can enjoy getting your stamping supplies with a discount!!!! Don't wait!!

6/22/2020

BEAUTIFUL A GRAND KID HEAT EMBOSSED CARD!!!


This is such a cute card. I just love this new Magenta Madness and this stamp set is perfect for cards I want to do for kids, grand kids and nieces! 

For this card I used the magenta madness for the card base.  

My front layers are with basic black card stock cut to 5-1/4" x 4". I then cut a piece of the Flowers for Every Season DSP to 5-1/8" x 3-7/8". 

My inside layers are basic black 5-1/4" x 4" and whisper white cut to 5-1/8" x 3-7/8". I then attaached a 1" x 3-7/8" piece of the dsp to the bottom of the whisper white to draw it all together.


 For the sentiment on the front I heat embossed using the white embossing powder on basic black card stock and then die cut with my circle layering dies. After cutting I used the multipurpose liquid glue to attach the sentiment to the gold hoop embellishment. 

I fussy cut the flower from another piece of the DSP and also attached it with the glue. I tied a small bow with the magenta madness 1/4" ribbon and attached to the top of the gold hoop. My final step was stamping the sentiment on the inside of the card.


 I love these sayings in the stamp set. Made for a great card to send to my girls! 


-7/8". 

5/04/2020

Last chance items!

The retirement list is out and these items will be gone before you know it!!!
Get them before they are gone!!!
Here's the link!

Last-Chance Products 

Mother's Day is right around the corner!


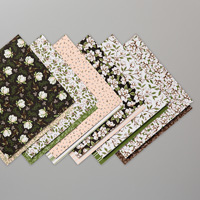
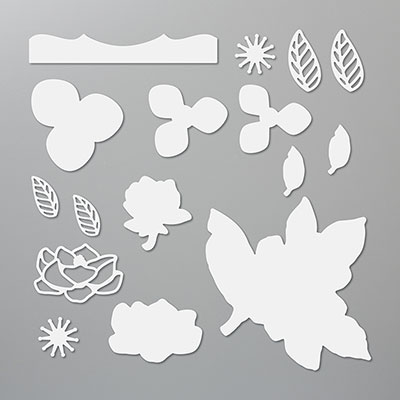
This beautiful Mother's day card is done with the paper and dies from the Magnolia Lane Suite on page 37 of our annual catalog. Today we are using the designer series paper and the magnolia memories dies.
 MAGNOLIA LANE DESIGNER SERIES PAPER

https://www.stampinup.com/ecweb/product/149484/magnolia-lane-designer-series-paper

MAGNOLIA MEMORY DIES


We start with a card base of basic black card stock cut 4-1/4" x 11". We then go back and cut 1" off the bottom of our card front. The layers for the front of the card are a whisper white piece cut at 4" x 4-1/4" and a piece of the dsp cut to 4" x 2-1/4".

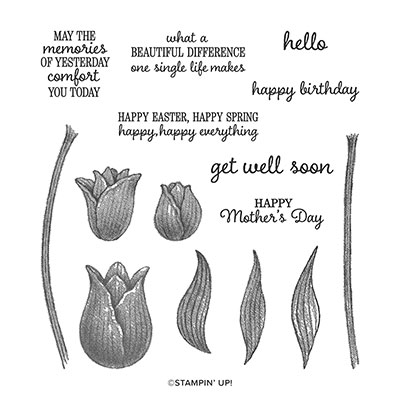
Using the die we run both the black card base and the whisper white layer through our die cutting machine.You can then add your layer of dsp to the top part of the whisper white piece and stamp your happy mothers day. The Happy Mother's Day sentiment that I used came from the Timeless Tulips stamp set which is in our occasions catalog.
TIMELESS TULIPS PHOTOPOLYMER STAMP SET (ENGLISH)

Next you can tie a piece of the ribbon around and tie a knot. I then used dimensional to attach the flower which I had fussy cut from a piece of the dsp.

For the inside of the card we cut another piece of the dsp at 4" x 2" and adhere to the bottom of the card base with the stripes facing out. To finish the inside we attach a piece of whisper white measuring 4" x 3-1/4" above the dsp. This gives us a completed inside.


Thanks for joining me and Happy Mother's Day!!!


4/25/2020

May's paper pumpkin!!! A sneak peak at the new in colors!! This is going to be awesome! Sign up now! https://www.paperpumpkin.com/en-us/sign-up/?demoid=2157505

4/14/2020

 Mountain Air birthday card

This beautiful masculine birthday card is made using the Mountain Air stamp set out of 2020 occasions catalog. I have to say this is my favorite stamp set in this catalog. It has beautiful images and is one of Stampin' UP!s new reversible stamp sets. There is also a matching die set available and if you bundle you will save 10% but for this card I only used the stamp set. 

For this card I cut the following pieces:

Garden green base - 8-1/2 x 5-1/2
Crumb cake- (1)- 4" x 51/4" (front layer),  ( 1)- 1" x 4" 
Very vanilla - (1) 5-1/4" x 4" for inside of card, (1) 3-3/4" x 5" for layer on front, (1) 4-1/4" x 3" for stamping on for the front, (1) 1" x  3-1/2" for greeting. 
Night of Navy - 4-1/2" x 3-1/4" for 
Country Club Designer Series Paper (1)- 2" x 5" and (1) 1" x 3-1/2" for banner

For this card I started with a garden green card base. I then layered a piece of crumb cake 5-1/4" x 4". On top of that I used a 5" x 3-3/4" piece of very vanilla. I then place a piece of the Country Club DSP 2" x 5" across the center. 


Now to the top section. You start by stamping your mountains in crumb cake onto a piece of very vanilla 4-1/4" x 3". At the same time as stamping my card front I also stamped my mountains onto the front of my very vanilla envelope.
                                     
The next step is the trees which I stamped in Garden green and also stamped on the bottom of a 5-1/4" x 4" piece of very vanilla to use on the inside of my card.

The next step is the reverse side of the trees which is the smooth side and it is stamped upside down under the trees to give it the effect of water. I used night of navy and stamped off first so the blue was not too dark. This gave it a very nice blue water look. 


The last stamping we need to do is the birds and the greeting. I stamped both of these in Early expresson. The greeting is on a very vanilla piece 1" x  3".  I used the happy birthday stamp from the here's a card stamp set. I use this stamp set a lot. I like that it has your greeting for the front of your card and also an inside sentiment too. 


To assemble the card I layered the front piece onto a piece of night of navy measuring 
 4-1/2" x 3-1/4". and then I used the banner punch to punch both my greeting and my 1" x 3-1/2" piece of  the blue plaid  paper from the country club dsp. I added some twine to my greeting and then used dimensionals to attach my greeting to the dsp and  then layered them onto a piece of crumb cake measuring 1" x 4" and attached to the front piece and then attached to the front of the card. I completed my card by adding a gold faceted gem to the crumb cake piece. 


Hope you enjoyed this card! 


4/03/2020

With our social distancing the Easter celebrations will be very different this year. There won't be Church services and large family gatherings like we are used to.  Something you can do though for all your firends and family are cards. This is the perfect way to let them know that you are thinking about them and want to stay in touch. Here is a very easy Easter card that would be wonderful for anyone on your list.


Here is a list of supplies that I used:


Easter Promise stamp set - 151544 - $19.00
Gorgeous Grape Cardstock - 146987 - $8.75
Pineapple Punch Cardstock - 146971 - $8.75
Whisper White Cardstock - 100730 - $9.75
Pineapple Punch 1/8" grosgrain ribbon - 146953  - $6.00
Stampin Blends Combos
Pineapple Punch - 147280 - $9.00
Call Me Clover - 147282 - $9.00
Old Olive - 144597 - $9.00
Tuxedo Black Memento Ink Pad - 132708 - $6.00


 Remember when placing an online order use the host code for the month and any online order placed will receive a special Thank you card from me. If you order is over $50 you will also receive an embellishment from me!!!!! Thanks for checking out my blog! 

Quilt cards!!

Beautiful Quilt cards using Stampin'Up! DSP I posted these a few weeks back on my facebook page and finally got around to making a video...